How to Configure and Use the ACF Gallery Field with Any WordPress Theme

Preview
Before we dive into the tutorial, let’s take a quick look at the outcome across different screen sizes.
Desktop

Mobile

Registration Gallery Field and Field Setup
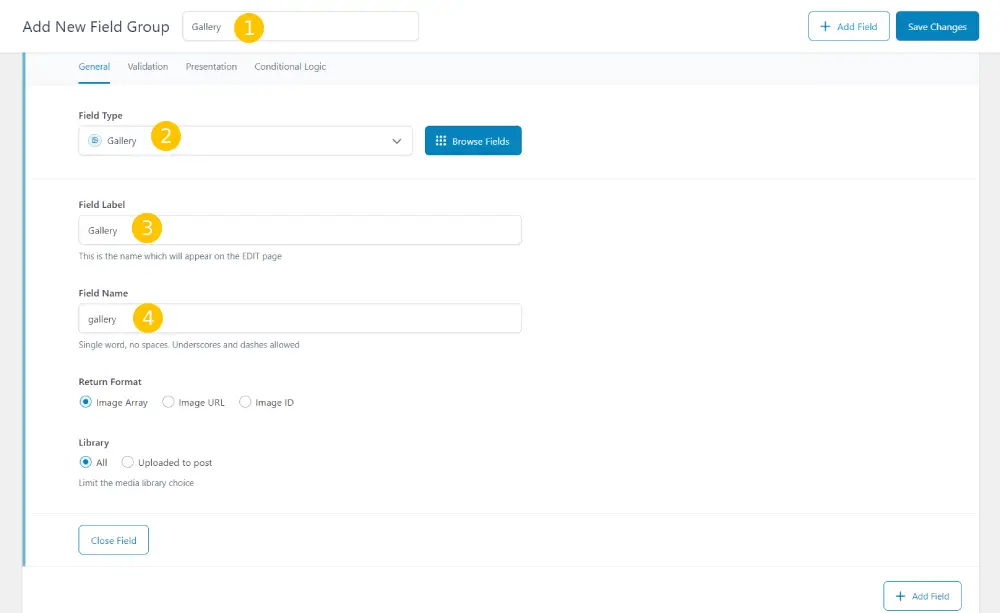
- First, we add a new ACF field group. Let’s name it “Gallery”.
- Second, assign the ACF Field Type to “Gallery”.
- Third, name the ACF field label as “Gallery”.
- Fourth, ACF Field Name as “gallery” (Remember this name).
Location Rules
Under the settings for the ACF field group, we’ll find the option for location rules. Here, we can set the locations where the field will appear. We can choose to incorporate the field into posts, pages, projects, or any other desired locations. In this example, I’ll assign it to a post, but you can add it to pages, projects, or any other location as you see fit.

Verifying Gallery Field Addition to Desired Post or Page
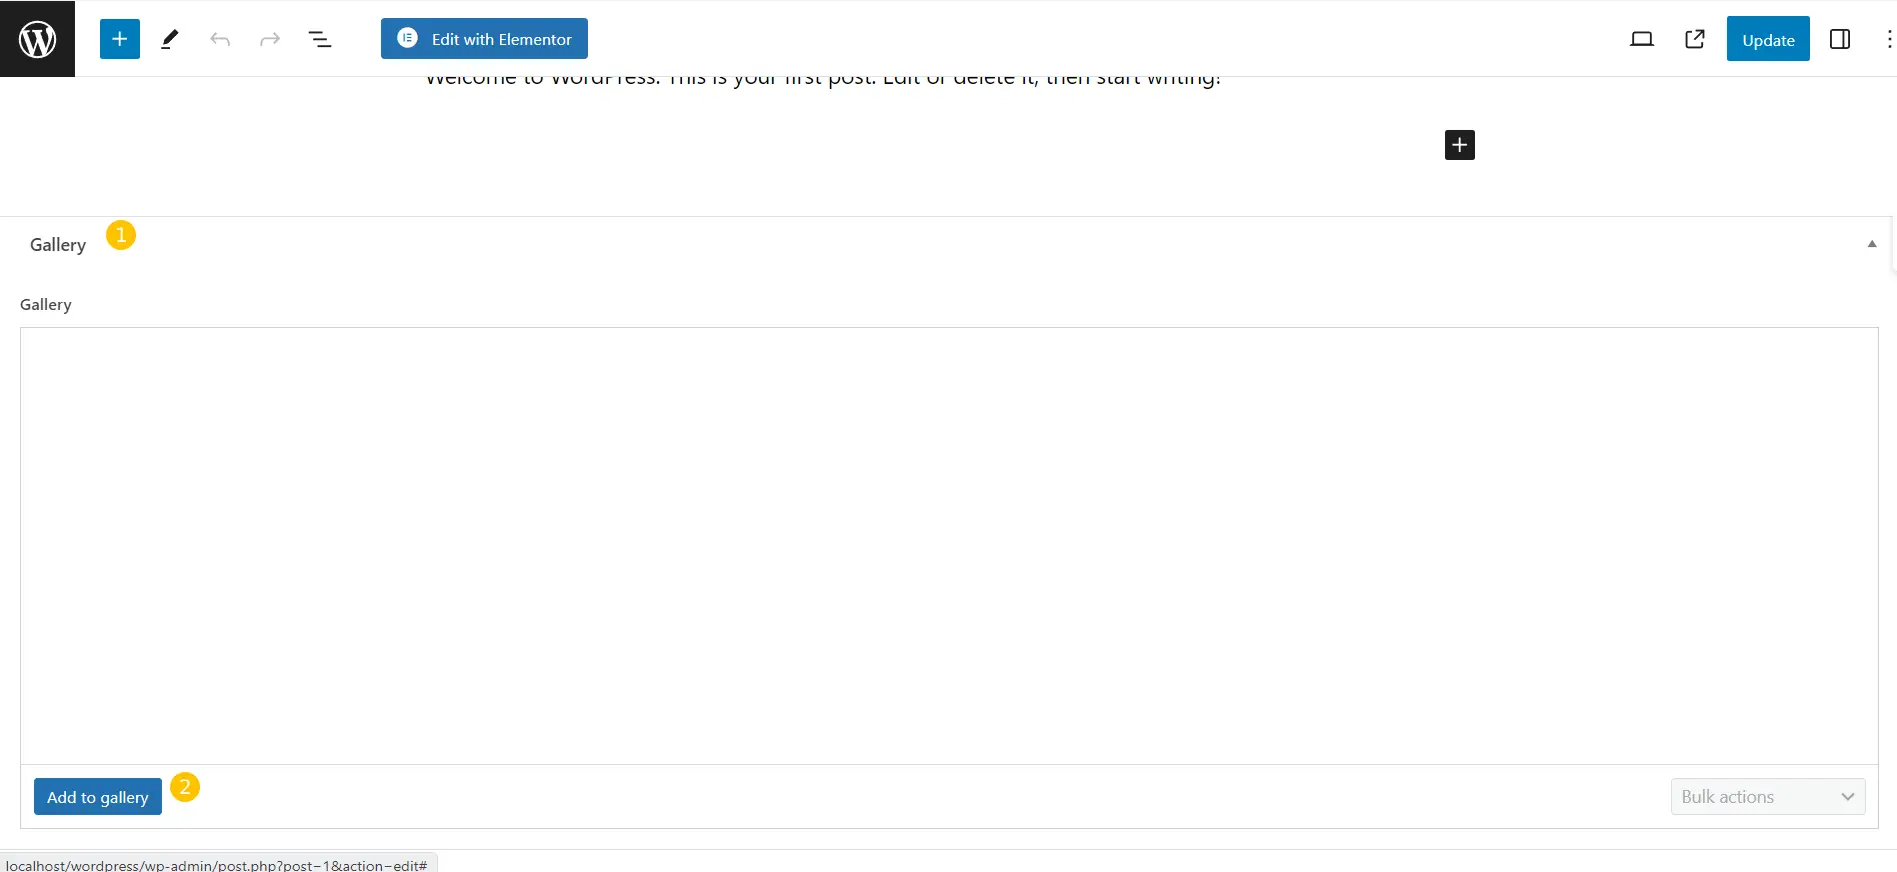
Next, we’ll confirm if the field has been successfully integrated into the post. I’ll navigate to the post and verify the presence of the field there.
Adding Images to the Gallery
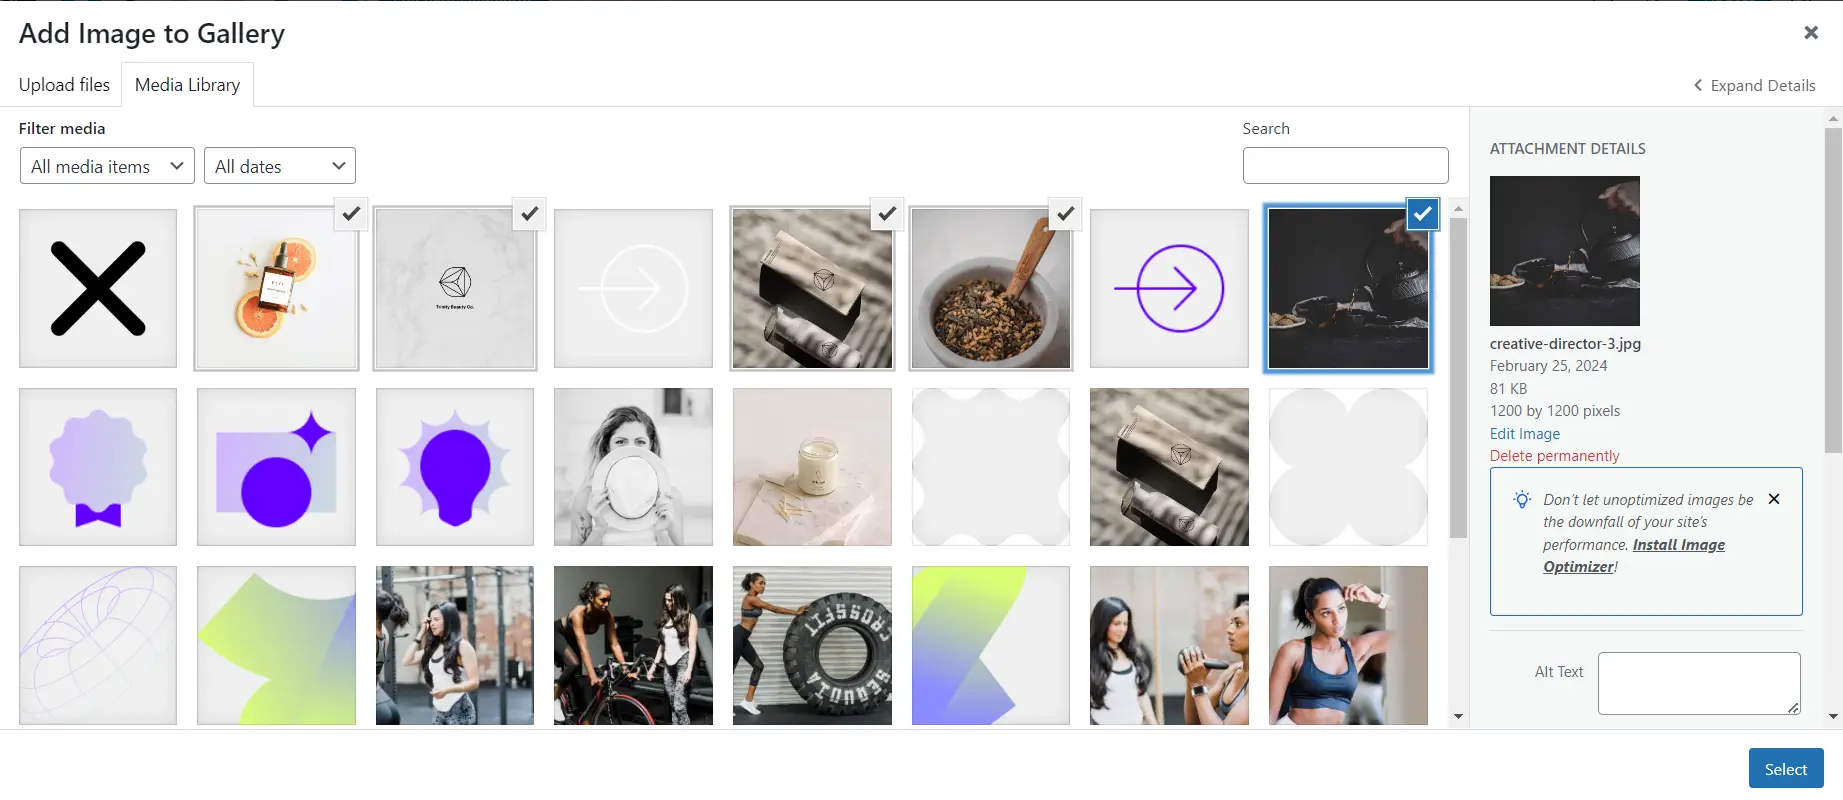
Once the field’s creation is confirmed, we’ll proceed to add images to it. We have the option to bulk select the images for addition to the gallery and can also include captions for each image.
Integrating Code into the Child Theme
function display_event_gallery_shortcode() {
    ob_start(); // Start output buffering

    // Check if the ACF function exists
    if( function_exists('get_field') ) {
        // Get the gallery field value
        $gallery_images = get_field('gallery');

        // Check if there are any images in the gallery
        if( $gallery_images ) {
            // Loop through each image in the gallery
            foreach( $gallery_images as $index => $image ) {
                // Display each image with appropriate classes for styling
                echo '<img src="' . esc_url($image['url']) . '" alt="' . esc_attr($image['alt']) . '" />';
            }
        } else {
            // If there are no images in the gallery, you can display a fallback message
            echo 'No images found.';
        }
    }

    // Return the output
    return ob_get_clean(); // Return buffered content
}
add_shortcode('event_gallery', 'display_event_gallery_shortcode');
Adding the Shortcode
[event_gallery]

Check in the Frontend

Updating the code to align the Images to Suit Requirements
function display_event_gallery_shortcode() {
    ob_start(); // Start output buffering

    // Check if the ACF function exists
    if( function_exists('get_field') ) {
        // Get the gallery field value
        $gallery_images = get_field('gallery');

        // Check if there are any images in the gallery
        if( $gallery_images ) {
            // Open a container for the gallery
            echo '<div class="gallery-container-ps">';

            // Loop through each image in the gallery
            foreach( $gallery_images as $index => $image ) {
                // Display each image with appropriate classes for styling
                echo '<div class="gallery-item-ps">';
                echo '<img src="' . esc_url($image['url']) . '" alt="' . esc_attr($image['alt']) . '" />';
                echo '</div>';
            }

            // Close the container for the gallery
            echo '</div>';
        } else {
            // If there are no images in the gallery, you can display a fallback message
            echo 'No images found.';
        }
    }

    // Return the output
    return ob_get_clean(); // Return buffered content
}
add_shortcode('event_gallery', 'display_event_gallery_shortcode');
.gallery-container-ps {
    display: flex;
    flex-wrap: wrap;
}

.gallery-item-ps {
    width: 33.33%; /* Three columns */
    padding: 5px;
    box-sizing: border-box;
}

.gallery-item-ps img {
    max-width: 100%;
    height: auto;
}

@media screen and (max-width:900px){
    .gallery-item-ps {
        width: 100%;
        padding: 5px;
    }
}
Conclusion

Next Blog Sneak Peak
Get ready for an exciting sneak peek of my next blog! We’ll delve into the world of enhancing gallery functionality by adding a lightbox feature to the images. Say goodbye to static galleries and hello to interactive experiences as we explore how to seamlessly incorporate a lightbox, allowing users to effortlessly slide through the images and immerse themselves in captivating visual content. Stay tuned for step-by-step instructions on how to elevate your galleries to the next level!
